Welcome to our step-by-step guide on installing your menstrual underwear machine. Menstrual underwear is a comfortable and eco-friendly alternative to traditional menstrual products. With this guide, you'll be able to easily set up and start using your machine in no time. Follow the instructions carefully, and you'll soon be enjoying the convenience and sustainability of menstrual underwear.
Step 1: Unpacking and Familiarizing Yourself with the Components
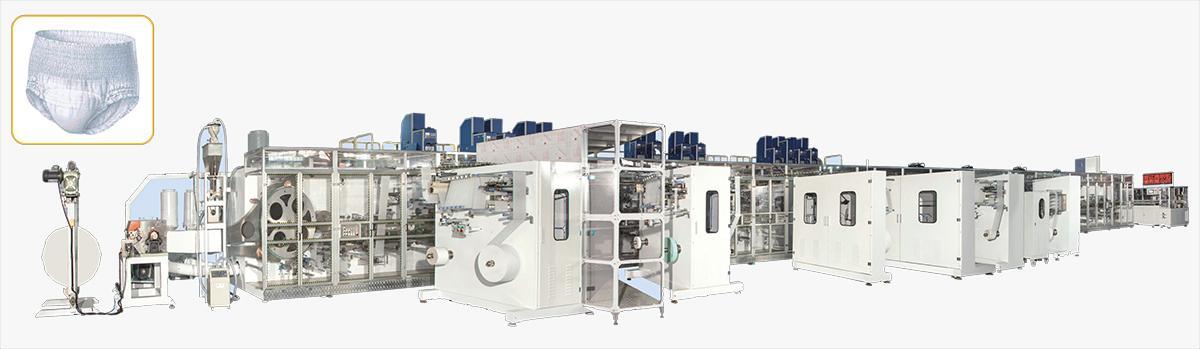
When you first receive your menstrual underwear machine, carefully unpack it and lay out all the components. This will allow you to familiarize yourself with each part and understand how they fit together. The machine typically consists of a base unit, a drum, a motor, and various attachments such as agitators and filters.
Step 2: Assembling the Machine
Begin by attaching the drum to the base unit. Ensure that it fits securely and is aligned properly. Then, connect the motor to the base unit. Most machines have a simple twist-lock mechanism for easy assembly. Once everything is in place, give the assembled machine a gentle shake to make sure it is sturdy.
Step 3: Connecting to Power Source
Locate the power cord and plug it into a nearby power outlet. Make sure the outlet is suitable for the voltage requirements of your menstrual underwear machine. It's always a good idea to plug the machine into a surge protector to protect it from electrical fluctuations.
Step 4: Adding Water and Detergent
Fill a sink or basin with warm water and add a small amount of mild detergent suitable for delicate fabrics. Follow the manufacturer's recommendations for the detergent quantity. Mix the water and detergent gently to create a soapy solution.
Step 5: Preparing the Menstrual Underwear
Before placing the menstrual underwear into the machine, rinse it under running water to remove any excess blood. Wring out the underwear gently to remove as much water as possible. This will help prevent excessive foaming during the cleaning cycle.
Step 6: Loading the Machine
Place the prepared menstrual underwear into the drum of the machine. Leave enough space for the underwear to move freely and allow proper cleaning. If you have multiple pairs of menstrual underwear, you can load them all at once as long as you don't exceed the machine's capacity.
Step 7: Running the Cleaning Cycle
Close the lid of the machine and select the appropriate cleaning cycle. Most machines offer different cycle options based on the level of dirtiness. Start with a gentle or normal cycle and adjust as needed. Press the start button, and the machine will begin agitating the water and cleaning the underwear.
Step 8: Drying and Maintenance
After the cleaning cycle is complete, carefully remove the clean menstrual underwear from the machine. Gently squeeze out any excess water and hang the underwear to dry. It's important to regularly clean the machine's filter and agitators to ensure optimal performance and longevity.
Conclusion
By following this step-by-step guide, you have successfully installed and started using your menstrual underwear machine. Enjoy the comfort, convenience, and eco-friendliness of this innovative menstrual product. Remember to regularly maintain and clean your machine to keep it running smoothly. Say goodbye to disposable menstrual products and embrace the sustainable future of menstruation with menstrual underwear!